Cloud System

Online Data Storage

Networking

Lan,Fiber Optik,Wireless

Antivirus

Do you have an antivirus installed and running on your system?

Gedgets

Mobile phone technologi

Social media

Trending Media social

Hardware

Ibm,Qnap

Application

Office aplication

virtual machine

In computing, a virtual machine is an emulation of a computer system. Virtual machines are based on computer architectures and provide functionality of a physical computer

Server

RACKMOUNT SERVER

Tuesday, December 12, 2017

cara stop windows update windows 10

Cara Halus #1 — Menggunakan Defer Upgrade

Pertama khusus bagi kamu pengguna Windows 10 Pro, kamu bisa mematikan automatic update secara halus melalui opsi Defer Upgrade.
Defer Upgrade artinya meminta Windows 10 untuk tidak mendownload dan menginstall update dalam jangka waktu hingga maksimal 8 bulan.
Kelebihan Defer Upgrade, kamu bakal tetap akan mendapatkan patch security sehingga Windows 10 kamu tetap aman, tetapi untuk update berupa fitur baru dan peningkatan fitur bakal tidak didownload sehingga kuota kamu bisa lebih hemat.
Nantinya kamu tinggal matikan Defer Upgrade dan melakukan Check Updates begitu terhubung dengan koneksi berkuota melimpah. Simple sekali khan?
Untuk mengaktifkan Defer Upgrade, buka Windows Update > Advanced Options

Setelah itu tinggal centang aja Defer Upgrade.
Tetapi ingat, opsi ini hanya ada di Windows 10 Pro saja. Bagi kamu pengguna Windows 10 Home tidak bisa melakukan cara halus ini.

Cara Halus #2 — Menggunakan Metered Connection

Cara halus lainnya adalah mengatur koneksi sebagai metered connection, dengan begitu Windows tidak akan mendownload update sampai kamu terhubung ke koneksi yang non-metered.
Namun cara ini hanya bisa dilakukan oleh pengguna Windows 10 yang menggunakan koneksi WiFi atau Mobile Broadband.
Untuk melakukannya cukup buka Settings dengan menekan CTRL + I > Network & Internet

Setelah itu pilih koneksi WiFi atau Mobile Broadband kamu > Advanced Options > dan akutfkan opsi Set as metered connection.

Cara Paksa #3 — Mematikan Services Windows Update

Dengan cara ini Windows Update akan mati total, termasuk juga update untuk patch security. Jadi pastikan jika kamu menggunakan cara ini, begitu terhubung ke internet dengan kuota melimpah segera lakukan update agar Windows kamu tetap secure dan optimal.
Untuk mematikan automatic update di Windows 10 dengan cara mematikan services nya, langsung saja buka Services.

Setelah itu cari Windos Update > Klik kanan > Properties

Setelah itu Stop Windows Update Services tersebut dan ubah opsi Startup type ke Disabled.

NB: Mematikan Windows Update Services bisa membuat kamu tidak bisa menggunakan Store dan tidak bisa mendownload Modern Apps. Resiko ditanggung penumpang.

Cara Paksa #4 — Modifikasi Melalui Group Policy

Cara ini hanya bisa dilakukan oleh pengguna Windows 10 Pro yang memiliki akses terhadap Group Policy. Cukup buka Run dengan Win + R > ketikkan gpedit.msc > Enter

Browse ke Computer Configuration > Administrative Templates > Windows Components > Windows Update.
Lalu klik kanan Configure Automatic Update > Edit

Setelah itu pilih opsi Enabled dan ubah automatic updating configuration ke Notify for download and notify for install > OK dan Apply


Dengan begitu jika ada update yang dirilis, Windows 10 tidak akan langsung download, melainkan akan memberi notifikasi terlebih dahulu.

Cara Paksa #5 — Melalui Command PowerShell

Sebenarnya ini merupakan shortcut dari cara paksa #3, hanya saja kita buat dalam bentuk powershell command agar kamu bisa mengaksesnya dengan lebih cepat.
Untuk mematikan Windows Update service, cukup buka PowerShell dan eksekusi command berikut ini:
stop-service wuauserv
set-service wuauserv –startup disabled
Untuk memastikan services sudah benar-benar mati, periksa dengan command ini.
get-wmiobject win32_service –filter “name=’wuauserv'”
Jika sudah mati maka StartMode nya adalah Disabled dan State nya Stopped.
Untuk menghidupkan Windows Update service lagi, cukup eksekusi command ini
set-service wuauserv –startup manual
start-service wuauserv

Bonus: Mengembalikan Settings Windows Update Lawas

Tips ini merupakan tambahan dari techten128 melalui kolom komentar. Dengan oprek registry ini kamu bakal bisa mengembalikan settings Windows Update lawas, sehingga bisa mematikan fitur automatic update di Windows 10.
  • Buka Registry Editor dengan Win + R > ketik regedit > Enter
  • Browse ke key HKEY_LOCAL_MACHINE\SOFTWARE\Policies\Microsoft\Windows
  • Di key Windows, klik kanan > New > Key > beri nama WindowsUpdate
  • Di key WindowsUpdate, lakukan lagi klik kanan > New > Key > beri nama AU
  • Klik kanan di key AU yang dibuat tadi, buat DWORD value dengan nama NoAutoUpdate
  • Klik dua kali di key NoAutoUpdateset menjadi 1. Klik OK.
  • Tutup Registry Editor. Buka Settings > Update & security > Windows Update, klik check for updates agar perubahan registry tadi bisa langsung diterapkan.
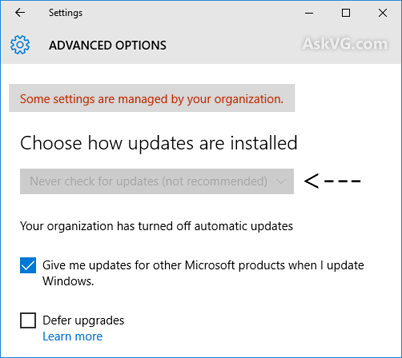
Kalo berhasil, nanti seperti gambar ini:
5 Cara Mematikan Automatic Update di Windows 10 Secara Paksa (Demi Menghemat Kuota Internet) — Tips #15

Sunday, December 10, 2017

CARA MEMBUAT FAVICON DI BLOG


FacebooTwitter


Favicon merupakan identitas sebuah blog yang biasanya pada website perusahaan diisi dengan gambar logo. Namun pada blog pribadi atau personal website biasanya diisi dengan gambar penulisnya atau gambar lain yang sesuai dengan tema blog. Intinya favicon memberikan identitas khusus sesuai dengan kesukaan pemilik blog agar sedap dipandang dan mudah dikenali oleh pembaca.
Caranya;
*. Pertama kita harus menyediakan gambar dengan bentuk bujursangkar (kotak) berukuran maksimal 100×100 pixels. Panjang dan lebar gambar harus sama persis, jika tidak sama atau melebihi 100kb maka gambar tidak bisa dimuat di favicon. Untuk menentukan ukuran gambar yang digunakan sebagai gambar favicon agar ukurannya bisa sama persis (100x100px) silakan anda lihat disini;
*. Setelah gambar anda buat, maka langkah selanjutnya;

1. Masuk ke dasbor blogger, perhatikan gambar dibawah ini. Langsung menuju Tata letak (no1), lalu klik Edit (no2) pada tab Favicon yang ada di sudut kiri atas. Maka akan muncul jendela kecil untuk mengunggah gambar favicon yang anda buat tadi.
2. Kemudian pada jendela kecil tersebut silakan klik Telusuri (no1 gambar dibawah). Lalu pilih gambar favicon di komputer yang telah anda buat tadi. Tunggu beberapa detik selama proses pengunggahan sampai gambar favicon kecil tampak di dasbor blogger. Jika gambar sudah muncul silakan klik Simpan (no2 gambar dibawah).
3. Selesai. Perhatikan bahwa gambar favicon biasanya akan mulai muncul di blog setelah 24 jam, terkadang sampai 1 minggu, dan bisa lebih. Tetapi pada akhirnya pasti muncul. Jadi setelah anda selesai memasang gambar favicon, gambar tersebut biasanya tidak akan bisa tampil di blog hari itu.
Sekian dulu informasi dari juragan cipir tentang cara memasang gambar favicon di blog. Semoga bermanfaat dan terimakasih.

Tuesday, November 28, 2017

Cara Download Video Facebook tanpa Aplikasi Paling Mudah

Cara Download Video & Audio di Facebook dengan Mudah tanpa Aplikasi

Seperti judulnya ya sob ini merupakan cara yang sangat simple praktis yang jelas gratis tanpa app tambahan, berikut tutorial cara unduh video di fb.
a. Langkah pertama silahkan anda login ke akun facebook.
b. Kemudian klik video yang anda ingin download dan menuju ke halaman video (klik kiri > show url dan salin url)
cara download video fb
c. Jika sudah mendapatkan urlnya, tinggal paste ke address bar.
download video facebook
d.Setelah itu sobat ganti url http://www.facebook.com/storygaktauane  dengan  http://m.facebook.com/storygaktauane.   Jadi intinya anda ubah www menjadi m.
e. Kemudian buka url tersebut, selanjutnya putar video tersebut. Selanjutnya arahkan mouse ke dalam video lalu klik kanan dan save as. maka video akan tersimpan di pc anda. Sedangkan untuk hp tinggal putar dan pilih opsi > simpan sd card dan video pun telah tersimpan di sd card hp android anda.

Thursday, November 23, 2017

How to fix NTLDR is missing windows xp

BIOS boot configuration
BIOS boot loader configuration screen

Fix #4: Replace NTLDR and NTDETECT.COM files

Windows XP users can replace the required files for NTLDR to load correctly by using your Windows Installation Disc. The files are named NTLDR and NTDETECT.COM.
Here are the steps to replace these files:
  1. Insert the Windows XP install CD
  2. Restart the computer and boot from the CD
  3. Press any key to boot from the CD
  4. Press R when the Windows Options menu is loaded to access Repair Console
  5. After this step, log into Windows by pressing 1 using the Administrator password
  6. Use the following commands to copy the NTLDR and NTDETECT.COM files from the Windows installation disk to the hard disk:
    copy D:\i386\ntldr C:\
    copy D:\i386\ntdetect.com C:\
    Where D:\ is the install CD’s drive letter and C:\ is the Windows XP partition’s drive letter
  7. Once these files are copied, remove the Windows installation disc from the disc drive
  8. Restart the PC
Here is an example of what the PC’s console output should look like once NTLDR and NTDETECT files are restored correctly:
Replacing ntldr and ntdetect.com files

Fix #5: Rebuild boot.ini file

The next steps are to rebuild the boot.ini file:
  1. Insert the Windows XP install CD
  2. Restart the computer and boot from the CD
  3. Press any key to boot from the CD
  4. Press R when the Windows Options menu is loaded to access Repair Console
  5. After this step, log into Windows by pressing 1 using the Administrator password
  6. Use the following command when Command Prompt appears:
    bootcfg /rebuild
  7. When the systems prompts you about adding an identified Windows installation to the boot list, answer “Y”(Yes)
  8. Enter “Windows XP” as Load Identifier and “/fastdetect” as OS Load Options.
  9. Remove the install CD
  10. Restart your computer
Here is an example of what the PC’s console output should look like once the boot.ini file is properly restored:
Fixing Boot.ini file

Fix #6: Change the bootsector code

On Windows Vista, Windows 7, Windows 8, Windows 8.1, or Windows 10 this error can be fixed by writing a correct BOOTMGR-related boot sector code to the bootable partition.
Here are the steps to write a correct boot sector:
  1. Insert the Windows Vista(or any newer version) install CD
  2. Restart the computer and boot from the CD
  3. Press any key to boot from the CD
  4. Click on Repair your computer after selecting proper language, time and keyboard input.
  5. Select the Windows installation drive, which is usually C:\, and click Next
  6. Choose Command Prompt when the System Recovery Options box appears
  7. Write the following command and press s Enter afterwards:
    bootcfg /rebuild
  8. If the program finds a Windows installation and asks whether it should add it to the boot list, press Y
  9. Remove the install CD
  10. Restart your computer
Here is an example of what the PC’s console output should look like once a boot sector is written correctly:

Writing a correct bootsect code

Fix #7: Delete excess files from root folder

If the PC’s operating system is an old version of Windows XP or Windows 2000 and it has too many files stored in the root folder, booting into the Repair Console from a Windows Installation disk and deleting the files from there is a possible solution.
Here are the steps to delete files from repair console:
  1. Insert the Windows XP install CD
  2. Restart the computer and boot from the CD
  3. Press any key to boot from the CD
  4. Press R when the Windows Options menu is loaded to access Repair Console
  5. After this step, log into Windows by pressing 1 using the Administrator password
  6. Enter the following command when Command Prompt appears to move to the root folder from the default C:\Windows folder:
    cd ..
  7. Enter the following command to display all files in the root folder
    dir
  8. Then, enter the following command to delete the file:
    del [filename]
    Where [filename] is the name of the file to be deleted
  9. Remove the install CD
  10. Restart the PC
Here is an example of what the PC’s console output should look like after a single file is deleted from the root directory:
Deleting a file from command line
Note that the Windows XP recovery console does not support mass file deletion in the recovery console, so manual file deletion may be a very long and tedious process if there is a lot of them. If that’s the case, it is possible to load from a more modern Windows CD, and use the
del *.* /A-S-H
command to delete all files in the current folder that are not hidden or system files:

Deleting multiple files

Wednesday, November 22, 2017

Free Thunder-Imagine dragons MP3


Neh lagu yang lagi boming  2017

Klik di bawah ini untuk download MP3
https://drive.google.com/file/d/1Fu2cQXmasAqH2Z_pETLheat4cWYUHd13/view?usp=sharing


Just a young gun with a quick fuse
I was uptight, wanna let loose
I was dreaming of bigger things
And wanna leave my own life behind
Not a yes sir, not a follower
Fit the box, fit the mold
Have a seat in the foyer, take a number
I was lightning before the thunder

[Refrain]
Thunder, thunder
Thunder, thun-, thunder
Thun-thun-thunder, thunder, thunder
Thunder, thun-, thunder
Thun-thun-thunder, thunder

[Chorus]
Thunder, feel the thunder
Lightning and the thunder
Thunder, feel the thunder
Lightning and the thunder
Thunder, thunder
Thunder

[Verse 2]
Kids were laughing in my classes
While I was scheming for the masses
Who do you think you are?
Dreaming 'bout being a big star
You say you're basic, you say you're easy
You're always riding in the back seat
Now I'm smiling from the stage while
You were clapping in the nose bleeds

[Refrain]
[Lyrics from: https:/lyrics.az/imagine-dragons/evolve/thunder.html]
Thunder, thunder
Thunder, thun-, thunder
Thun-thun-thunder, thunder, thunder
Thunder, thun-, thunder
Thun-thun-thunder, thunder

[Chorus]
Thunder, feel the thunder
Lightning and the thunder
Thunder, feel the thunder
Lightning and the thunder
Thunder

[Bridge]
Thunder, feel the thunder
Lightning and the thunder, thunder

[Chorus]
Thunder, feel the thunder
Lightning and the thunder, thunder
Thunder, feel the thunder
Lightning and the thunder, thunder
Thunder, feel the thunder
Lightning and the thunder, thunder
Thunder, feel the thunder (feel the)
Lightning and the thunder, thunder

[Refrain]
Thunder, thunder, thunder
Thun-thun-thunder, thunder
Thunder, thunder, thunder
Thun-thun-thunder, thunder
Thunder, thunder, thunder
Thun-thun-thunder, thunder
Thunder, thunder, thunder
Thun-thun-thunder, thunder


Thanks

Friday, November 17, 2017

Tutorial Ganti password Wifi Linksys

                Untuk Akses Login ke Wifi Linksys  ada 2 cara yang pertama bisa menggunakan Laptop dan yang kedua bisa menggunanakan HP Android.

1.  Menggunakan Laptop
Contoh:
a.       Cari Acces Point  Wifi kamar dan koneksikan dengan password yang lama
b.      Jika lupa password bisa menggunakan kabel Jaringan / UTP dan koneksikan ethernet wifi
c.       Jika sudah terhubung dengan wifi misalnya Room3242
d.      Masuk Ke browser bisa menggunakan internet exploler/chrome/mozilla dll
e.      Ketik IP addres  seperti di bawah ini
Setiap kamar IP Addres berbeda beda:
ROOM                          IP ADDRES
Room1112                   10.10.1.112
Room2113                   10.10.2.113
Room3116                   10.10.3.116 dll
Contoh Room3242:                


f.        Isi Nama pengguna dan Password
Nama Pengguna       :admin
Password                    :mm2100
g.       Maka akan masuk sperti gambar di bawah ini

h.      Kemudian Klik  Sub menu Wireless
i.         Kemudian klik Wireless security
j.        Selanjutnya Ganti password Acces point Wifi sesuai yang akan di gunakan,pada Passphrase Klik save Setting,Selesai


2.  Menggunakan Hp Android
Contoh:
a.       Cari AP di setiap kamar dan koneksikan dengan password yang lama
b.      Jika sudah terhubung dengan wifi misalnya Room3242
c.       Masuk Ke browser bisa menggunakan internet exploler/chrome/mozilla dll
d.      Ketik IP addres  seperti di bawah ini

Setiap kamar IP Addres berbeda beda Contoh IP di setiap kamar:
ROOM                          IP ADDRES
Room1112                   10.10.1.112
Room2113                   10.10.2.113
Room3116                   10.10.3.116 dll
Contoh Room3242:
e.      Isi Name dan Password
Name                            :admin
Password                    :mm2100
f.        Maka akan masuk sperti gambar di bawah ini
g.       Kemudian Klik  Sub menu Wireless
h.      Seleanjutnya Ganti password Acces point sesuai yang akan di gunakan pada Passphrase Klik save Setting,Selesai