Cloud System

Online Data Storage

Networking

Lan,Fiber Optik,Wireless

Antivirus

Do you have an antivirus installed and running on your system?

Gedgets

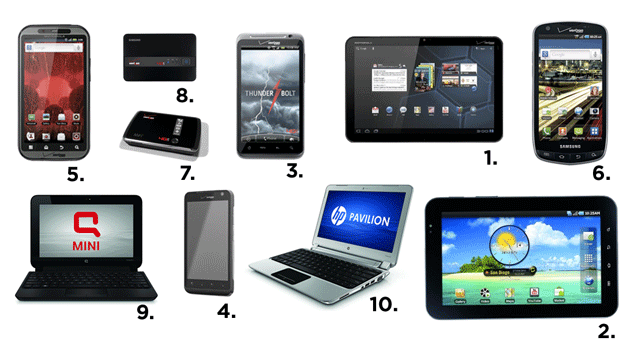
Mobile phone technologi

Social media

Trending Media social

Hardware

Ibm,Qnap

Application

Office aplication

virtual machine

In computing, a virtual machine is an emulation of a computer system. Virtual machines are based on computer architectures and provide functionality of a physical computer

Server

RACKMOUNT SERVER

Friday, November 30, 2018

Symantec Endpoint Protection Manager Failed to connect to the server

Failed to connect server 
Make sure that server is running and your session has not timed out.
If you can reach the server but cannot login.make sure that you ptovided the correct paramater
If you are experiencing network issues,contact to your adaministrator

To adjust the Symantec Endpoint Protection Manager Failed to connect to the server :

1. Click search

2. After that right click all services Symantec Endpoint Protection Manager  


3.  Click Start 

4. Services Status Symantec Endpoint Protection Manager  become RUNNING,

Please try it

Monday, November 26, 2018

Cara Mengatasi Notifikasi Suara di Whatsapp Tidak Muncul


  1. Pengaturan pada Notifikasi aplikasi Whatsapp
Cara pertama, anda bisa mencoba untuk melakukan pengecekan pada Notifikasi WhatsApp. Cara ini bisa kita lakukan langsung pada Aplikasi WhatsApp (WA). Kemungkinan notifikasi tidak tampil di layar hp android anda karena belum melakukan pengaturan pada Aplikasi WhatsApp. Hal ini bisa terjadi karena pengaturan Whatsapp pada bagian nada, pop up, getar, atau yang lainnya. Untuk melakukannya, anda bisa ikuti langkah – langkahnya dibawah ini.
Buka Aplikasi WhatsApp » Setelan » Notifikasi » Selanjutnya, pada bagian tersebut anda bisa cek semua notifikasi yang ada, baik itu Nada, Getar, Notifikasi Pop Up, Lampu, dan lainnya.

  1. Cek Kelola Pemberitahuan Pada Manage Aplikasi Whatsapp
Jika cara diatas tidak berhasil namun pengaturannya sudah sama persis, maka gunakan cara kedua yaitu mengecek pada bagian opsi Kelola Pemberitahuan. Mungkin hal ini yang menyebabkan notifikasi wa di hp android tidak muncul. Pengaturan ini sangat penting, Jika ada tidak mengizinkan Android untuk menampilkan Notifikasi maka sampai kapanpun WhatsApp juga tidak akan ada pemberitahuan pesan masuk. Untuk langkah – langkahnya anda bisa simak tutorialnya pada berikut ini.
Buka menu Pengaturan » Setelan Tambahan » Manajemen Aplikasi » Semua » Cari “WhatsApp” »Kemudian tap “Kelola Pemberitahuan”. Pada bagian tersebut, anda bisa aktifkan pemberitahuan masuk pada aplikasi WhatsApp.

  1. Hapus Cache maupun Data pada Aplikasi Whatsapp
Apabila kedua cara diatas tidak mempan menampilkan notifikasi whatsapp yang tidak muncul di hp xiaomi, Samsung, OPPO, Lenovo, Asus Zenfone, LG, Motorola, Sony, Advan, Acer, Axioo, Nokia, dan lainnya. Maka gunakan cara terakhir yaitu menghapus cache dan data pada aplikasi whatsapp. Cara ini terbilang sangat ampuh untuk mengembalikan pengaturan WA ke default (Awal). Dan hal ini juga dapat membersihkan file – file yang bersifat sementara seperti basis data, file cache, history, bookmark, chat, dan lainnya. Untuk penerapan langkah – langkahnya anda bisa mengikuti tutorialnya pada berikut ini.

Buka menu Pengaturan » Setelan Tambahan » Manajemen Aplikasi » Cari “WhatsApp” » Kemudian tap “Paksa Berhenti” dan “Hapus Data”.

Dengan menggunakan 3 Cara diatas semoga dapat membantu anda untuk menemukan solusi mengatasi notifikasi pemberitahuan whatsapp yang tidak muncul di Android.


Demikianlah sedikit ulasan singkat mengenai bagaimana cara mengatasi notifikasi WA (Whatsapp) yang tidak muncul atau tidak tampil di layar hp android anda. Semoga bermanfaat.

Tuesday, November 6, 2018

SOLUSI STIKER TIDAK MUNCUL DI WHATSAPP

Meski telah dirilis, rupanya fitur ini belum sepenuhnya merata bagi pengguna Android maupun iOS.


Untuk kamu yang menantikan adanya fitur ini, harap bersabar lebih lama.
Pasalnya, peluncuran stiker ini bertahap di setiap perangkat Android.• Cara Kirim Stiker Melalui WhatsApp , Begini Langkah Mengunduhnya!Artinya, tidak semua orang akan mendapatkannya saat peluncuran.
Lantas bagaimana cara mendapatkan fitur WhatsApp Sticker ini?
Pengguna smartphone perlu untuk mengupdatenya ke versi WhatsApp terbaru.
• Trik Mengetahui Sosok yang Sering Dihubungi Pacar Atau Teman Lewat WhatsApp, Super Simpel!Berikut TribunStyle.com lansir dari smartphoneku.com, cara menampilkan stiker Android di beberapa ponsel mulai dari Samsung, Lenovo, XiaomiVivo, hingga Oppo.
1. Download WhatsApp Versi Terbaru yakni 
2.18.329

2. Install WhatsApp

3. Close Aplikasi Whatsapp

4. Buka Kembali Aplikasi Whatsapp

5. Pilih ikon stiker yang berada di deretan emoji sejajar dengan ikon GIF.


Cara membuat stiker pada whatsapp

Adanya stiker tentu akan membuat chat kita semakin berwarna kan?
Ternyata stiker ini bisa kita bikin sendiri loh.

ADVERTISEMENT


WhatsApp (Hitech News Daily.)

Kalian bisa menggunakan wajah kalian sendiri atau objek lain sebagai stiker di Whatsapp.
Nah, berikut ini tim NexTren.com akan memberikan caranya untuk kamu, yuk simak!
Aplikasi Background Eraser- nextren.grid.id
 1.  kamu harus mendownload aplikasi Background PNG di Playstore
Aplikasi ini bisa kalian download secara gratis.
2.  buat sebuah foto selfie kalian atau foto objek yang akan kalian gunakan sebagai stiker di Whatsapp.
3.  kalian harus membuat latar dari gambar ini menjadi tarnsparan atau PNG.
Cara membuat gambar tersebut menjadi transparan, yaitu dengan menggunakan aplikasi Background PNG.
Pada aplikasi ini kalian harus menghapus backgroundnya dengan perlahan yah.
Personal Stiker for Whatsapp - nextren.grid.id
4.  jika langkah-langkah di atas sudah selesai, kalian bisa mendownload aplikasi Personal Stiker for Whatsapp di Playstore.
Aplikasi ini sendiri dapat kalian download secara gratis juga yah.
Jika sudah, kalian tinggal membuka aplikasi ini dan secara otomatis hasil gambar-gambar yang sudah kalian buat bisa terdeteksi yah.
Namun, harus ada minimal 3 foto yah yang ada, jika cuma 1 atau 2 maka foto tersebut tidak bisa digunakan sebagai stiker.
Jika ingin lebih mudah, kalian bisa menggabungkan foto-foto yang sudah dibuat menjadi satu file tersendiri sehingga tidak berantakan.
Menambahkan Stiker di Whatsapp - nextren.grid.id
5.  kalian tinggal menekan tombol add yang tersedia, maka stiker tersebut secara otomatis akan terdownload ke Whatsapp  kalian.
Nah, mudah bukan membuat stiker sendiri untuk digunakan di Whatsapp?
Jika gagal, pastikan lagi kalau kalian sudah mengikuti langkah-langkah di atas yah.
Selamat mencoba! 


Thursday, October 11, 2018

Microsoft Office cannot verify the license for this product

When you start a Microsoft Office 2016 or Office 2013 application, such as Outlook, Word, Excel, or PowerPoint, you may receive the following error message:
 
Microsoft Office cannot verify the license for this product. You should repair the Office program by using Control Panel.


Microsoft Office cannot verify the license for this product. You should repair the Office program by using Control Panel.


Cause


The Office application is running in compatibility mode for a different operating system.

Resolution


To fix this issue, follow these steps to stop running the application in compatibility mode:
  1. Exit the Office application that triggers this error.
  2. Locate your Office application, depending on your installation type of Outlook and bitness of Windows and Outlook:
    • MSI-Based installation type:
      <disk drive>\Program Files\Microsoft Office\Office1x
      <disk drive>\Program Files(x86)\Microsoft Office\Office1x
    • Click-to-Run installation type:
      <disk drive>\Program Files\Microsoft Office\root\Office1x
      <disk drive>\Program Files(x86)\Microsoft Office\root\Office1x

  3. Note The 1x placeholder represents your version of Office (16 = Office 2016, 15 = Office 2013)
  4. Right-click the Office application that triggers the error, and then click Properties.
  5. If the Compatibility tab is available, click it, and then follow these steps. If the Compatibility tab does not exist, go to step 5.
    1. On the Compatibility tab, clear the Run this program in compatibility mode for option.
    2. Click Change settings for all users.
    3. On the Compatibility for all users tab, clear the Run this program in compatibility mode foroption.
    4. Click OK two times.
  6. If the Compatibility tab does not exist, click Cancel on the application Properties page to close it, and then follow these steps:
    1. Right-click Outlook.exe, and then select Troubleshoot compatibility.
    2. Select Troubleshoot Program.
    3. Clear all options, and then click Next.
    4. Select the No, I am done investigating the problem option, and then click Next.
    5. Click Close.

Monday, September 24, 2018

cannot create file right click the folder you want to create the file in outlook 2010

An usual error in Outlook 2010 / 2007 / 2003 / XP that appears when you try to save an attachment is: ‘Cannot save the attachment. Cannot create file . Right-click the folder you want to create the file in, and then click Proprieties on the shortcut menu to check your permissions for the folder‘.
1. Go to Start regedit and press ENTER:
2. Now browse to: HKEY_CURRENT_USER\Software\Microsoft\Office\<version*>\Outlook\Security
*replace <version> with: 14.0 ( if you have Outlook 2010 ) / 12.0 ( Outlook 2007 ) / 11.0 ( Outlook 2003 ) / 10.0 ( Outlook XP )
3. Double click on OutlookSecureTempFolder, and the pop up with the Edit String will appear. Here you replace Value data with the new location of the folder ( EX: D:\HereIwantMyAttachments )

4. Close and reopen Outlook, and now you should be able to save the attachments in the mail.

Wednesday, August 1, 2018

How to Install active directory windows server 2012

This article guides you through the steps to configure a working Active Directory.
In the Dashboard select to add a Role.
 Click Next.
Select Role based or feature based installation and click Next.
 Select the server's name and click Next.
 Select Active Directory Domain Service.
 Click Add Features.
 Click Next.
  Click Next again 
 Now click Install.
 Click Close to close the wizard.
   In the server manager, click the alert in the upper right.
 In that window click Promote this server to a domain controller.
In this example it creates a new forest and adds a domain name too.


TIP: Always try to use a domain’s name with an extension.

Please see: http://social.technet.microsoft.com/wiki/contents/articles/17974.active-directory-domain-naming-considerations.aspx for that matter.
 Select the Functional level, enter the DSRM password and click Next.


TIP: SharePoint 2010 SP1 and SharePoint 2013 now support Windows 2012.


 Click Next (and ignore the error, it’s a normal error)
 Click Next.


TIP: Never use a name longer than 15 characters. It will get shrunk to 15 characters in the Windows OS in the logging screen and such place.

 Use the default value and click Next.
 Click Next 
 Now click Install
 After a reboot we can finally login with our domain credential!

Post Active Directory Installation Task

DNS

Let’s go finish our DNS configuration! We go open the MMC.
 In the MMC we see our zone (it seems OK), so we go one step back.
 Right-click the DNS’s server name and we select Properties.
 In the Forwarders setting add our ISP’s DNS.

DHCP

Now that our AD and DNS is settled, we can configure our DHCP if needed. Use the server as a DHCP’s server to allow it to control all ACL over the DHCP, but you can use other gear too. Just be sure to set the DNS server for the DHCP’s client to point to the DNS’s server and to give the correct DNS’s suffix if you can.
Go to our Server Manager and click to add Roles. We select the DHCP Server.
 Click Add Features.
 Click Next
 Click Next 
 Click Install 
 Now close the wizard.
 Now go open the DHCP’s MMC.
 Right-click over IPv4 and select New Scope
Click Next 
 Give the scope a name. A descriptive name is always a good idea. (Like Site A or B). After we click Next 
 Give the scope range and we click Next
 Click Next
 Leave the default value and we click Next
 Click to configure the scope options and we click Next
 Give the IP of our router and we click Next
 Here is the important task - we validate to be sure the DNS's suffix is correct. We click Next after
Leave that blank, and we click Next
 Click Next !
 Click Finish !
 Review the scope's options in the console to be sure.